[LS104x] 使用ostree更新rootfs
我们可以使用ostree来更新rootfs系统。以下demo基于ls1046a进行ostree更新rootfs展示:
以下板子的相关信息:
原版rootfs:ubuntu 18.04
新版rootfs: busybox
该部分仅仅是为了做demo演示,不作为任何工程设计。
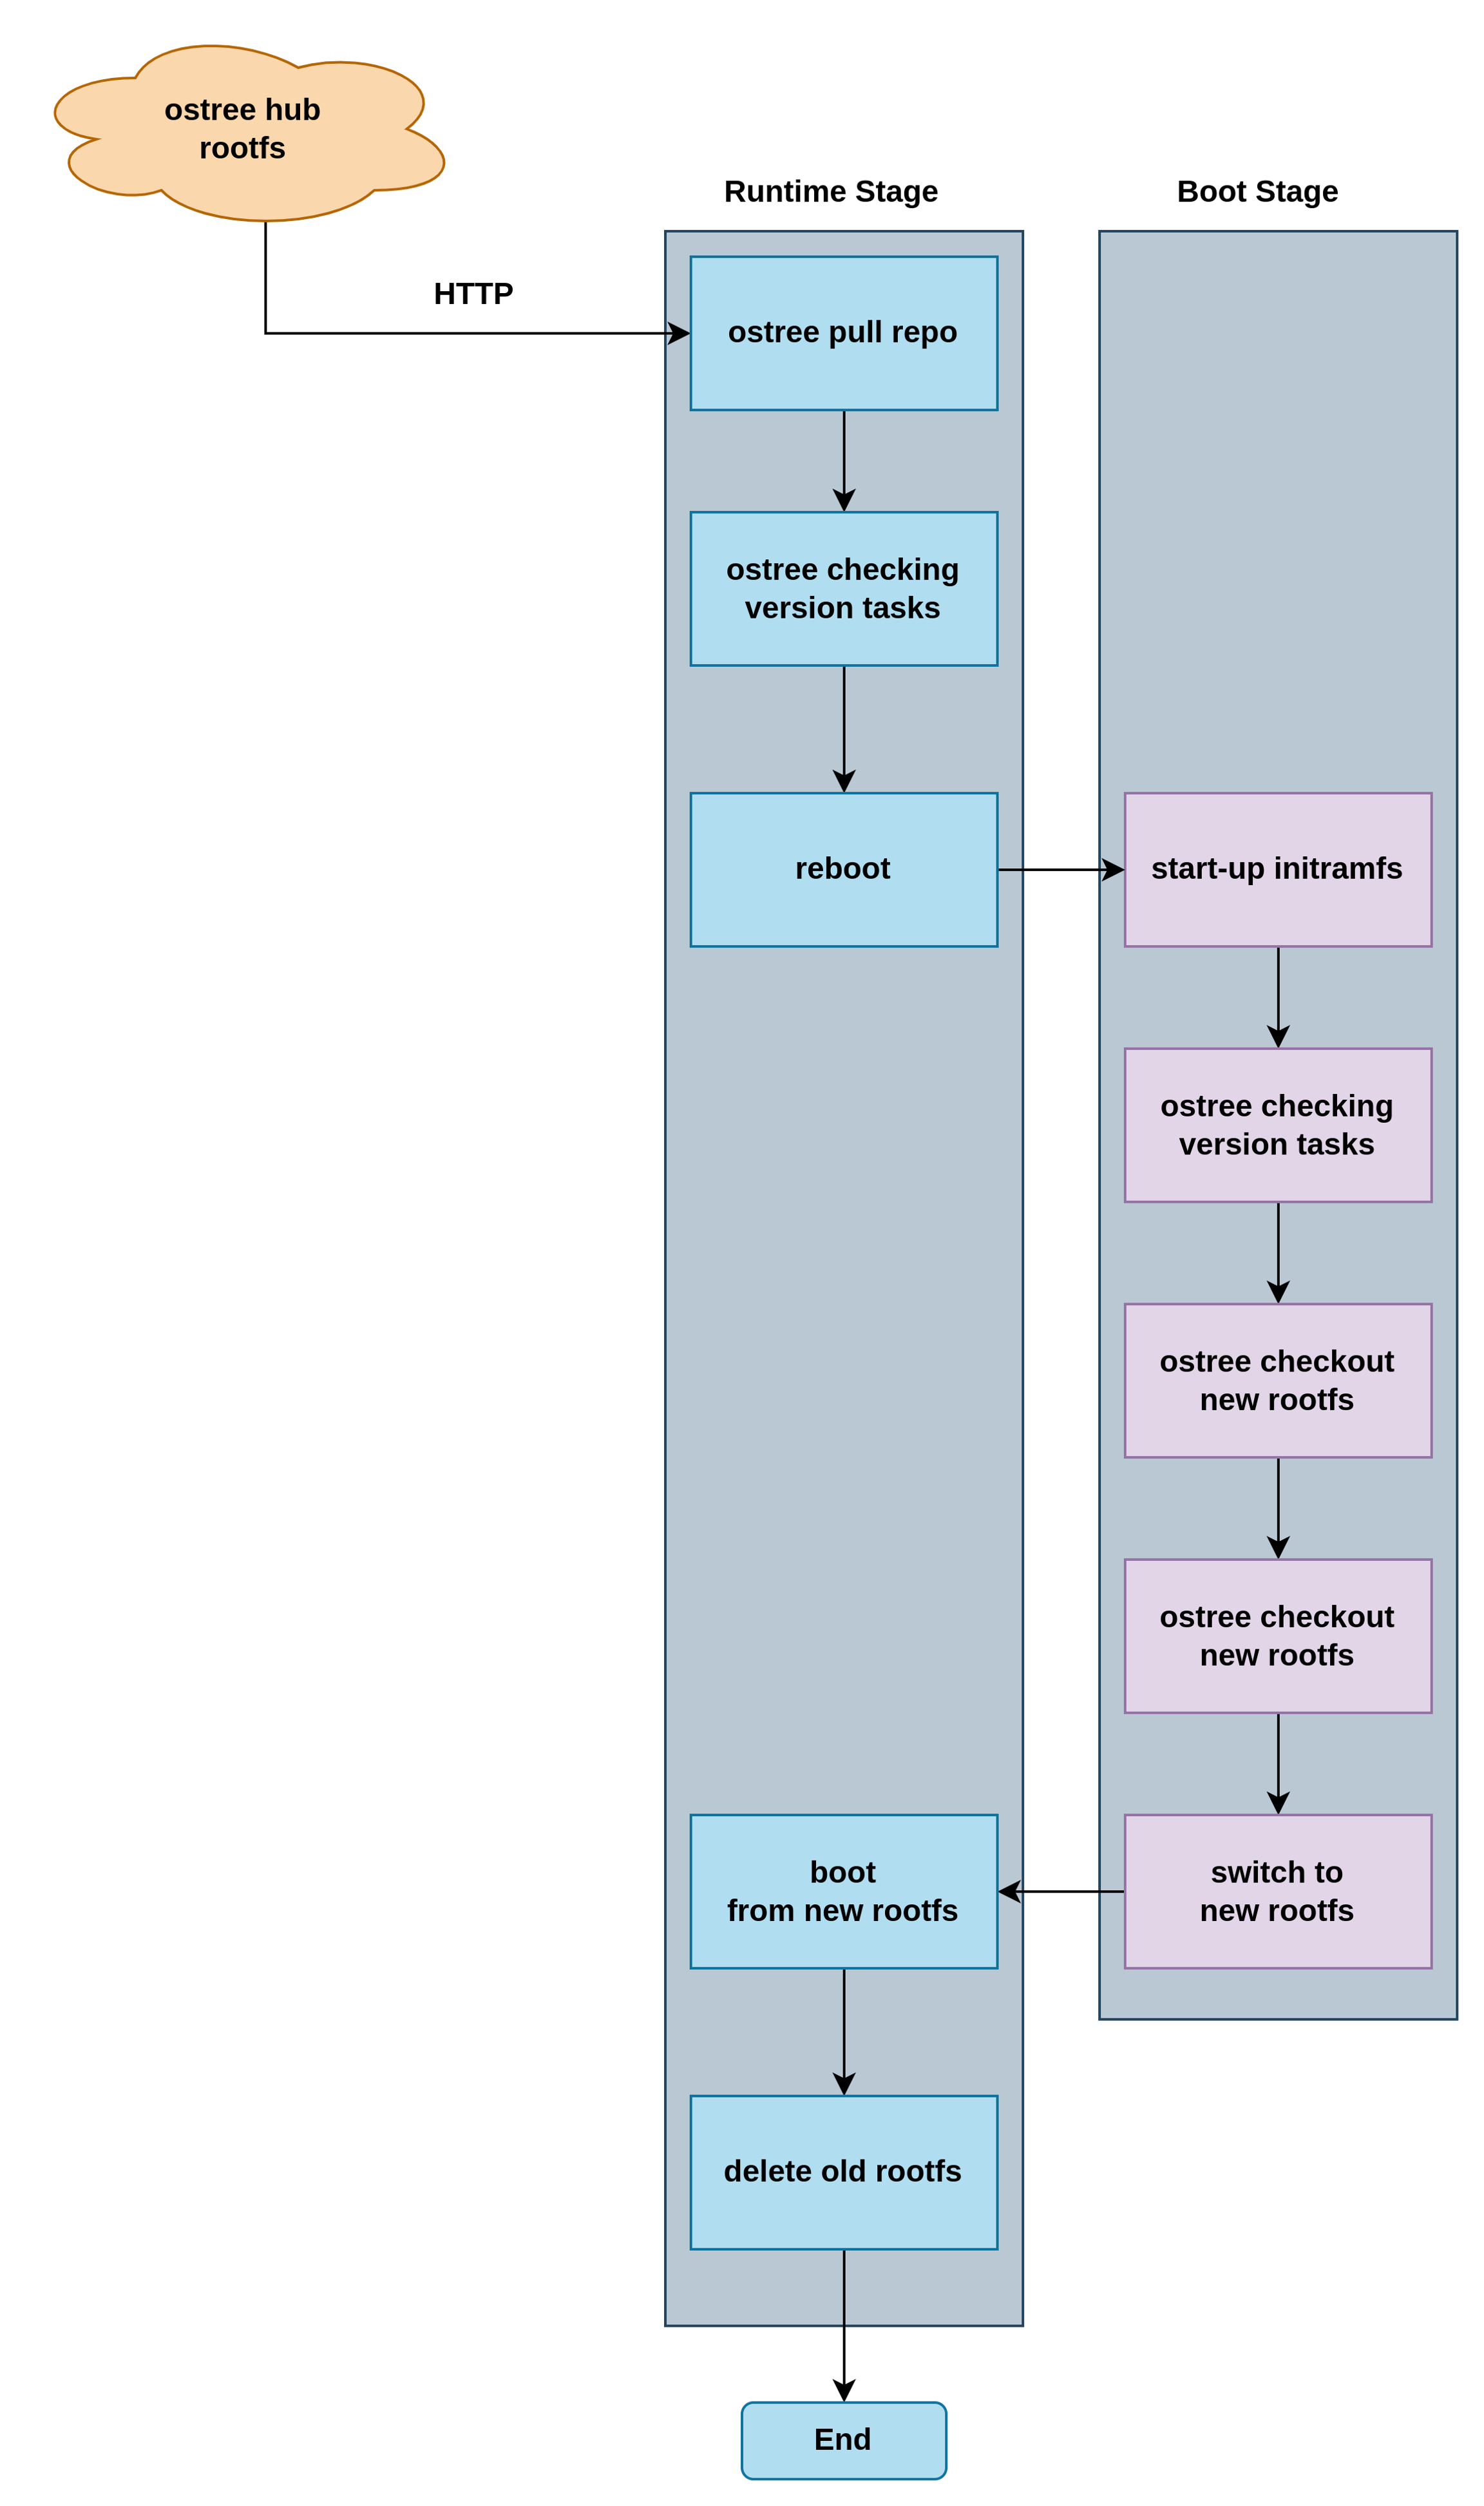
ostree在ubuntu中会从服务更新仓库;
ubuntu重启之后,initramfs检测到有更新,切换更新的busybox的rootfs;
initramfs切换到新的busybox的rootfs启动;
这里为了演示initramfs简化了逻辑,即发现是ubuntu则切换新的busybox系统,发现是busybox就切换到ubuntu上面。(系统只能在ubuntu中拉取更新)
目标,从ubuntu更新为busybox。更新原理如图所示:
1. 服务器端配置
本文使用HTTP而不是HTTPS,并且服务器使用本机HOST局域网更新。
1.1 仓库配置
仓库配置中包含:
需要进行ostree仓库的初始化
需要在ostree仓库中增加busybox的rootfs文件
需要commit仓库变化
需要生成summary文件
需要启动服务器监听程序
以下为一些具体的步骤:
创建初始化仓库:
mkdir -p repo && ostree --repo=repo init --mode=archive-z2 && mkdir -p rootfs
rootfs文件为存放busybox rootfs文件的路径;
repo文件夹为仓库的配置文件;
1.2 仓库上传
先上传一个空的版本:
ostree --repo=repo commit --branch=master --subject="image v1 (empty)" rootfs/
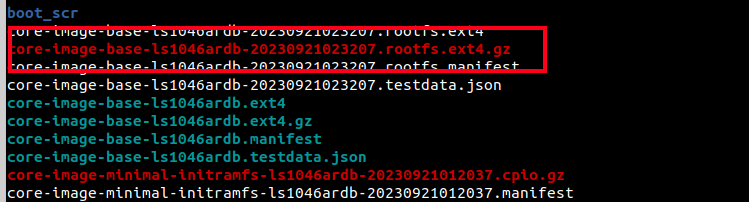
加入busybox的rootfs文件可以从yocto工程导出来。我这里用的是 core-image-base这个rootfs,因为空间比较小。关于如何挂载EXT4.gz文件,可以参考附录。
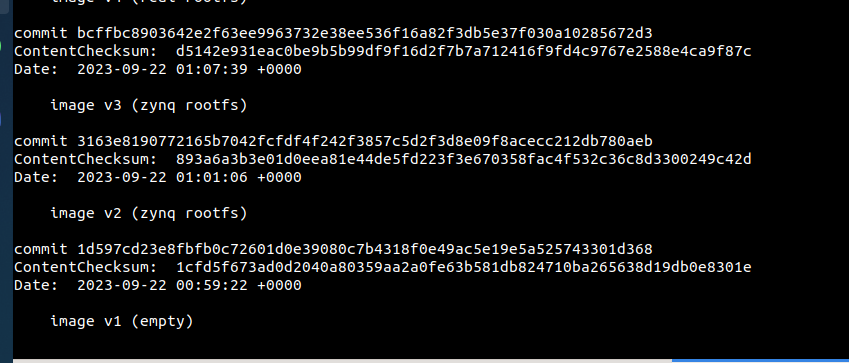
把文件解压之后,放入rootfs文件夹,并且 commit 它为 “image v2“:
ostree --repo=repo commit --branch=master --subject="image v2 (zynq rootfs)" rootfs/

可以查看上传的类似于git log的信息:
ostree log master --repo=repo
一定要进行summary否则客户端找不到发布的版本。
ostree summary --repo=repo ./repo/branch.summary -u
1.3 服务监听
使用服务器监听repo:
python3 -m http.server 8000 --bind 192.168.32.2 --directory repo

2. 客户端配置
ostree分为有网络版本和无网络版本。在一些ramdisk中为了节约空间,我们并不使能网路功能。检测ostree工具是否有网络,可以查看ostree pull命令是否存在,如果存在则是网络版本;如果没有pull子命令,则是阉割的无网络版本。在ramdisk中,我们只是使用ostree还原最新的rootfs。ostree的下载功能都在linux runtime中的ostree完成。
2.1 初始化(Linux Runtime)
初始化的工作需要在Linux Runtime完成。我们需要把ostree文件夹放入到sd卡的rootfs中。
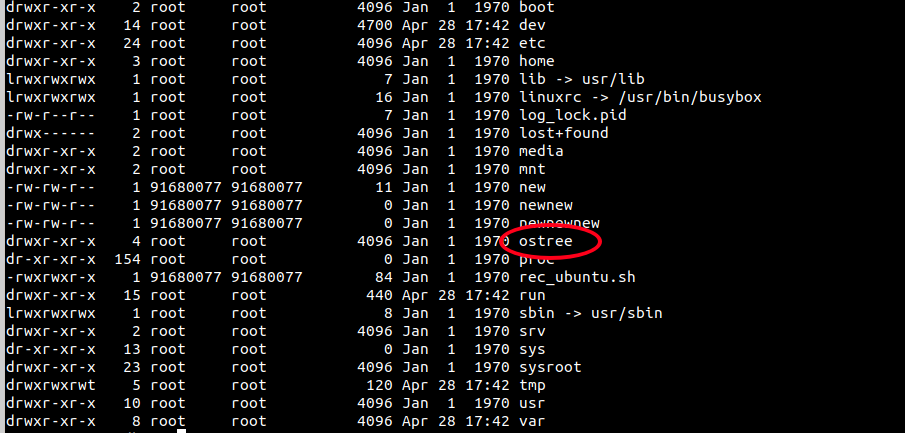
在ostree文件夹中:
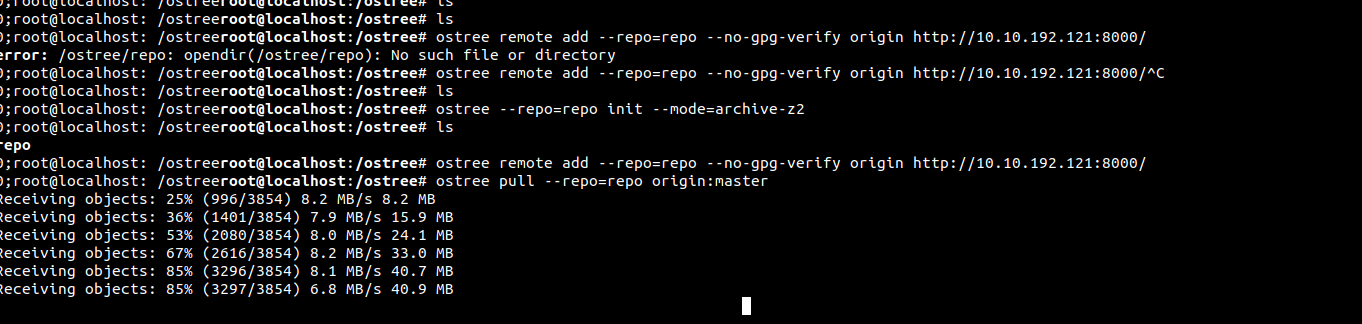
ostree --repo=repo init --mode=archive-z2
`ostree remote add --repo=repo --no-gpg-verify origin http://10.10.192.121:8000/
2.2 从服务器端下载仓库
ostree pull --repo=repo origin:master
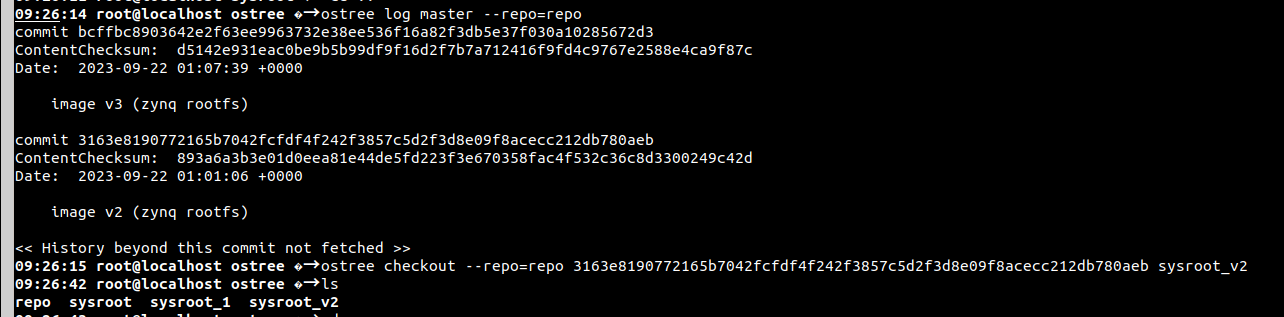
可以查看历史:
ostree log master --repo=repo
2.3 还原升级rootfs(boot阶段)
使用ostree命令从仓库还原出rootfs,然后可以配合各种操作把文件传输到/mnt区域。最后完成rootfs的切换。 `` ostree checkout --repo=repo master sysroot
ostree log master --repo=repo
3. RAMDISK用例
实现本文开篇的功能使用以下是RAMDISK中的脚本:
附录
如何从core-image-base-ls1046ardb-20230921023207.rootfs.ext4.gz 获取源文件。
先解压: gzip -dv core-image-base-ls1046ardb-20230921023207.rootfs.ext4.gz
挂载: mkdir mount_tmp
mount -o loop core-image-base-ls1046ardb-20230921023207.rootfs.ext4 mount_tmp
可以在mount_tmp导出所有的原始文件,注意同步的时候不要使用cp而使用rsync命令来保证文件的属性一致。
sudo rsync -a [src] [dest]
最后更新于